AWS DMS (Data Migration Service) is an AWS cloud service created to migrate data in a variety of ways. AWS DMS supports migration between 20-plus database and analytics engines, such as Oracle to Amazon Aurora MySQL, MySQL to Amazon Relational Database (RDS) MySQL, Microsoft SQL Server to Amazon Aurora PostgreSQL, MongoDB to Amazon Document DB, Oracle to Amazon Redshift, and to and from Amazon Simple Storage Service (S3).
AWS DMS helps migrate databases to AWS quickly and securely with minimal downtime, supporting both homogenous migrations, such as Oracle to Oracle, and heterogeneous migrations between different database engines, such as Microsoft SQL Server to Amazon Aurora.
Homogeneous:

Heterogeneous:
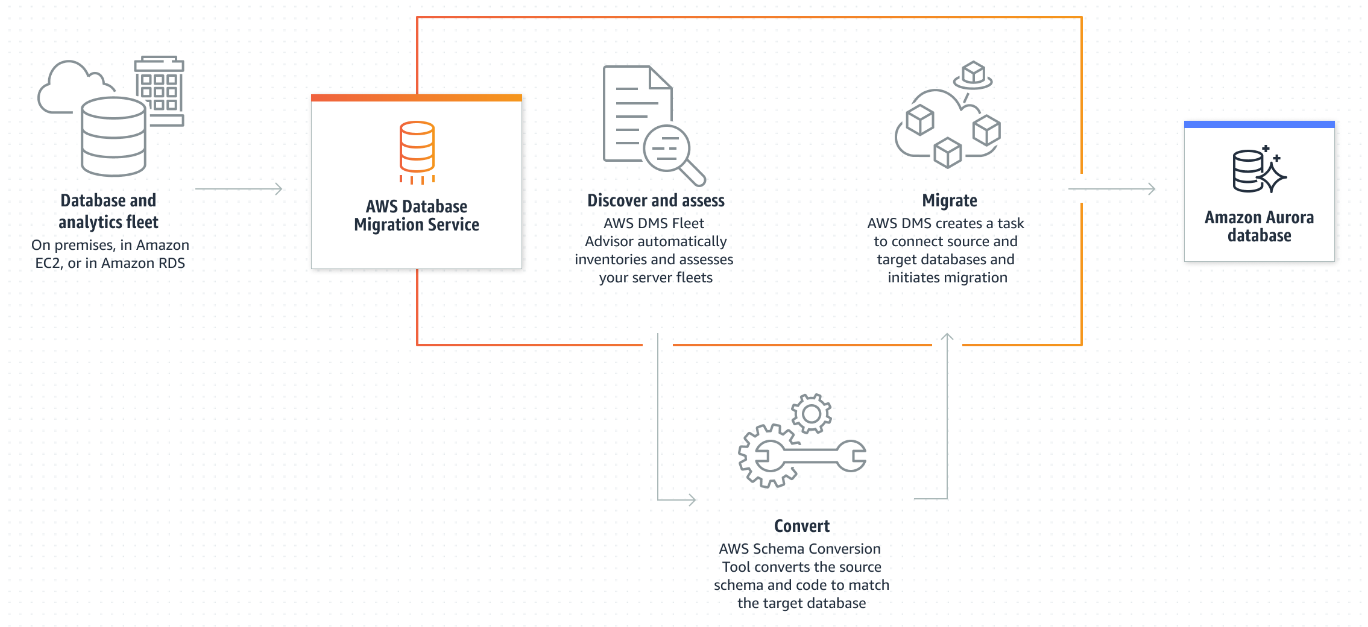
In this document, we examine a use case in which we will migrate MSSQL Standard Edition 2017 database to another same server but in different region using AWS Database Migration Service (AWS DMS) in near-real time.
Resources:
- Amazon Elastic Compute Cloud (Amazon EC2) – A Microsoft Windows Server 2019 Base with Microsoft Standard 2017 AMI in Mumbai Region and in Hyderabad Region
- VPC Peering
- AWS Database Migration Service (AWS DMS) – AWS DMS is used to continuously replicate data with low latency from EC2 MySQL source to Amazon RDS for SQL Server target.
Process:
Step 1:
Launch the Instances:
For this demo, I have selected VPC CIDR 10.100.0.0/16 in Hyderabad Region and 10.0.0.0/16 in Mumbai Region. I have launched the Instances in that specific VPC respectively, and in Public Subnet.
Launch a Windows Instance with Standard Edition MSSQL in Hyderabad Region.
![]()
Launch a Windows Instance with Standard Edition MSSQL in Mumbai Region.
![]()
In Security Group, I have allowed all traffics.
Step 2:
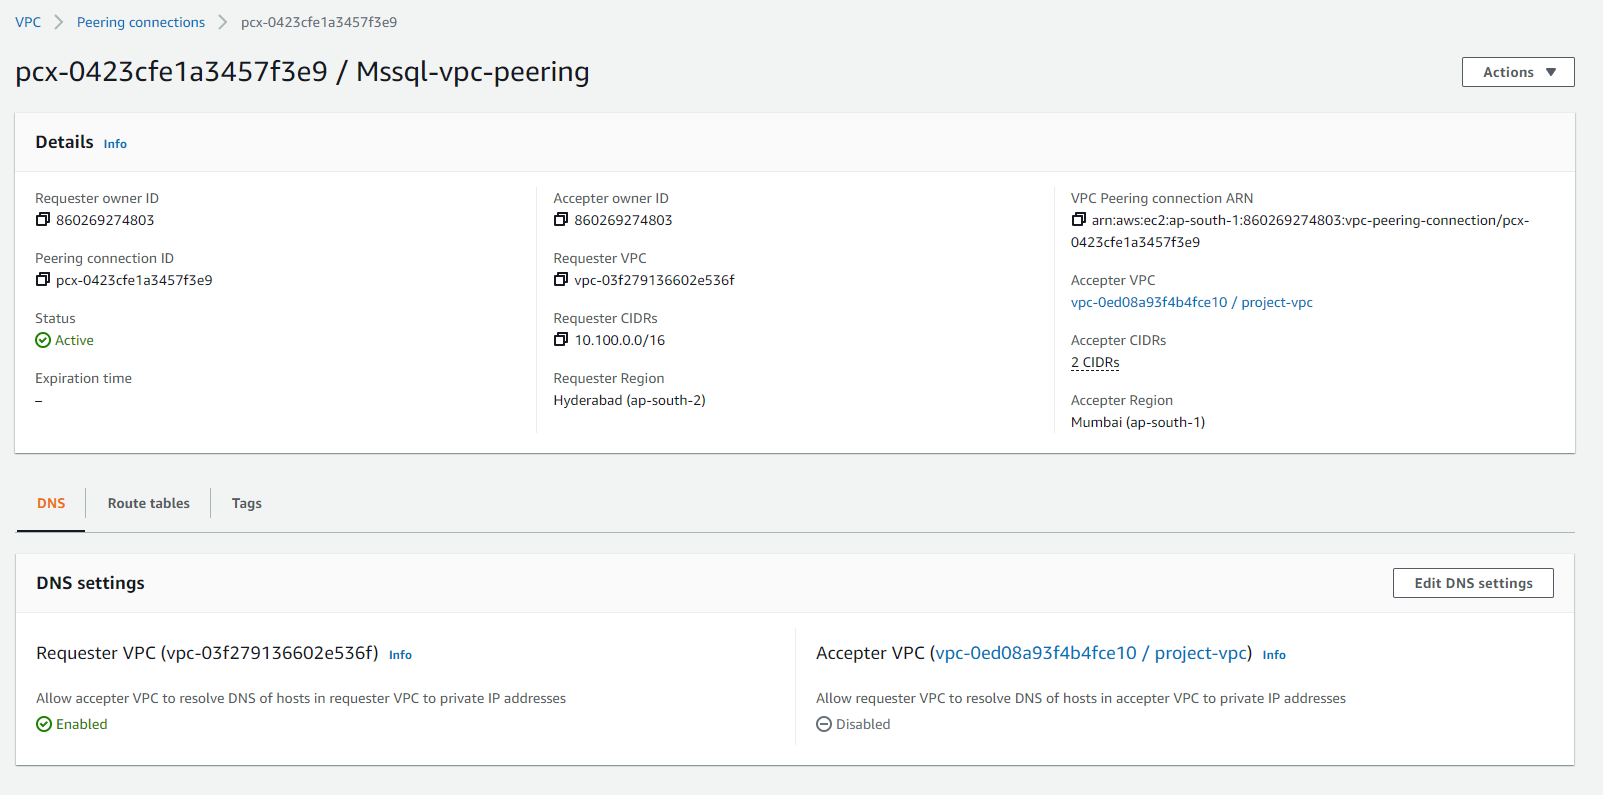
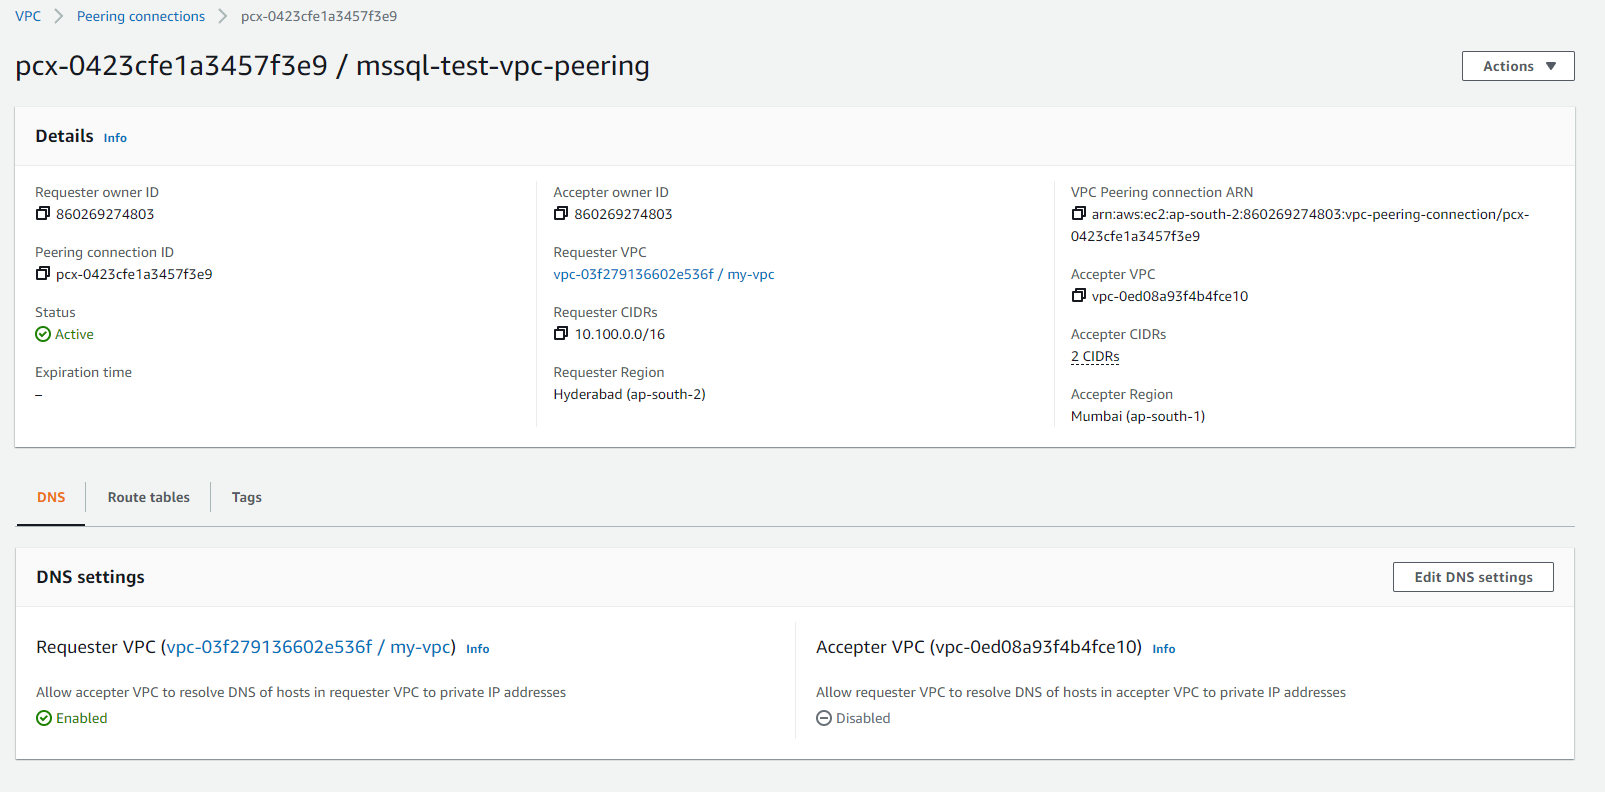
Setup VPC Peering:
In Mumbai Region:
![]()

In Hyderabad:
![]()

After the Peering connection is configured we will setup the Database.
Step 3:
Set up Database in Server:
First, we will log in to the Hyderabad Server and download a sample backup file and restore it. For this demo, I have download northwnd.bak file and saved it.
Then I have used SSMS to log in to database with Windows Authentication.
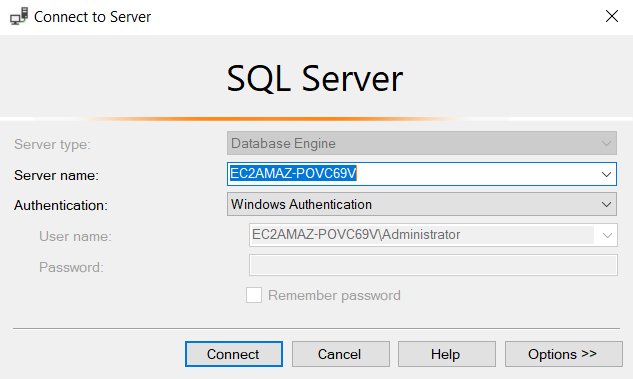
Then on the Server 🡪 Right Click to Properties 🡪 Enabled SQL and Windows Authentication on Security and Save


On Security 🡪 Logins 🡪 Activate sa User by Double Click and Set Password for sa User and on Status make sure Login is enabled then Click Ok.

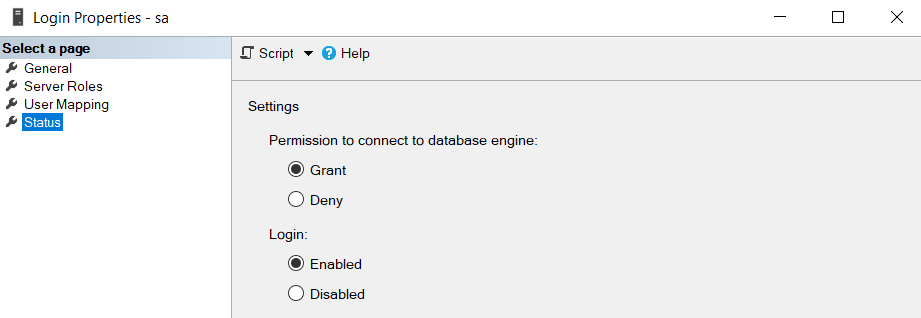
After these changes we need to restart MSSQL Server from Configuration.

For the connection with IP, if this configuration do not work we need to enable this Server in Firewall.
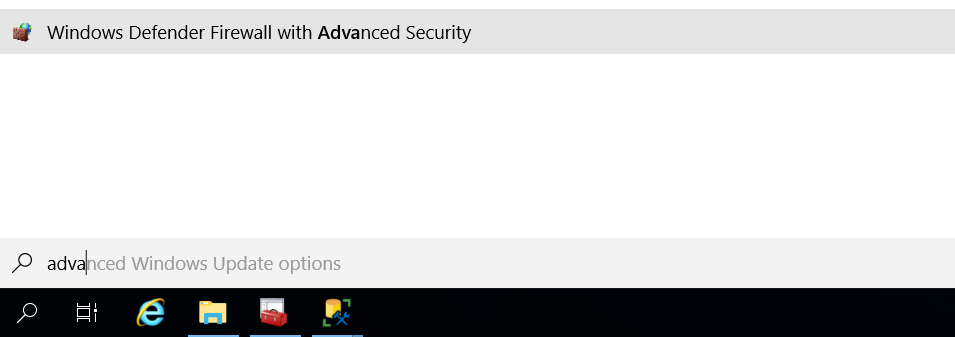
Open Windows Defender Firewall with Advanced Security. Then Inbound Rules 🡪 New Rule

Rule Type 🡪 Custom, All Program (Customize) 🡪 Apply to MSSQLSERVER 🡪 Click Next 🡪 Give Name to the Rule
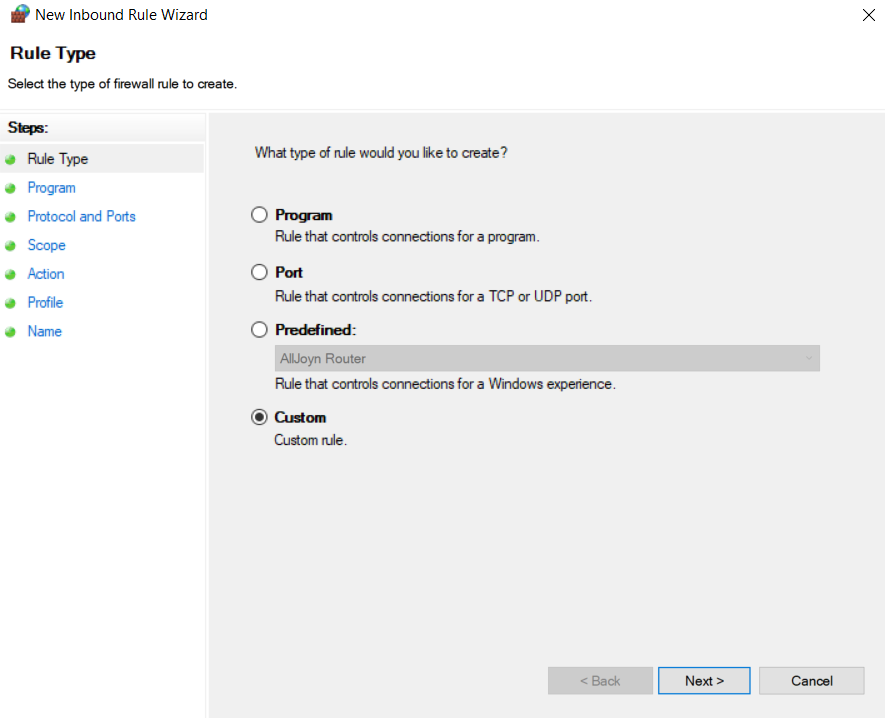
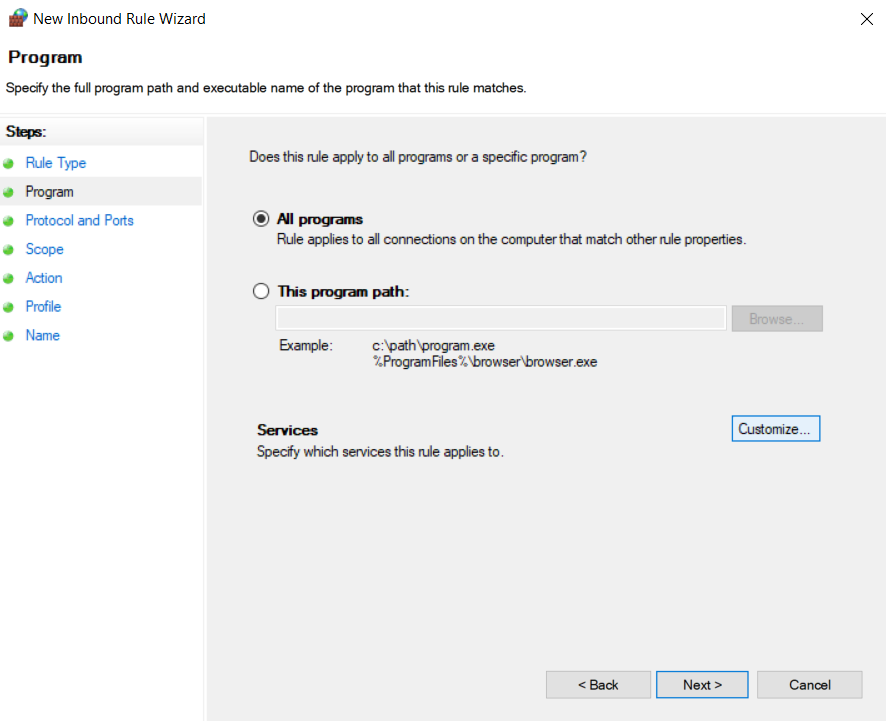
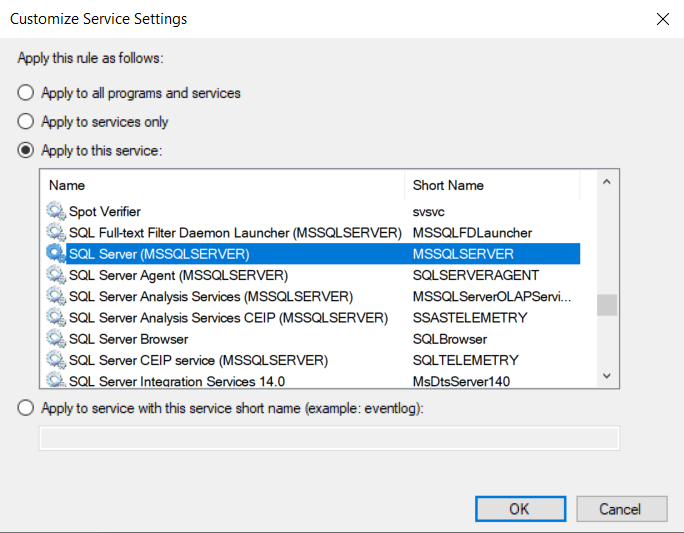

We have to follow the same steps on Destination Server in Mumbai.
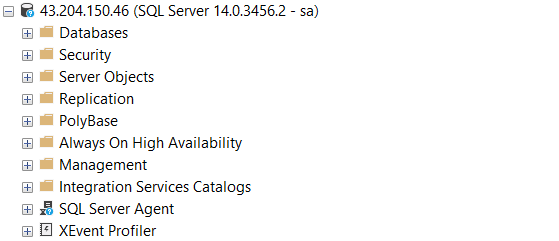
Now, we will Login in SSMS with IP and sa user in both servers.
Mumbai Region Server:
Hyderabad Region Server:
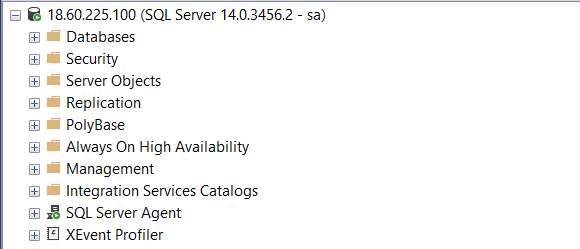
In this Server we will import the backup of northwnd.bak file which we have downloaded. We will click on Restore Database 🡪 select Device 🡪 select the path where the backupfile is 🡪 select the file and Ok 🡪 Click on Add 🡪 Ok 🡪 Database will be restored.
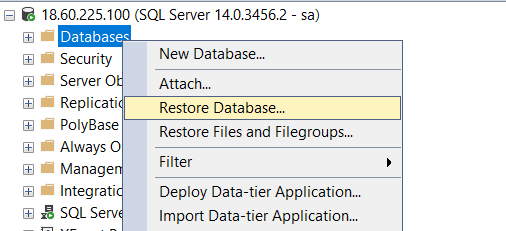
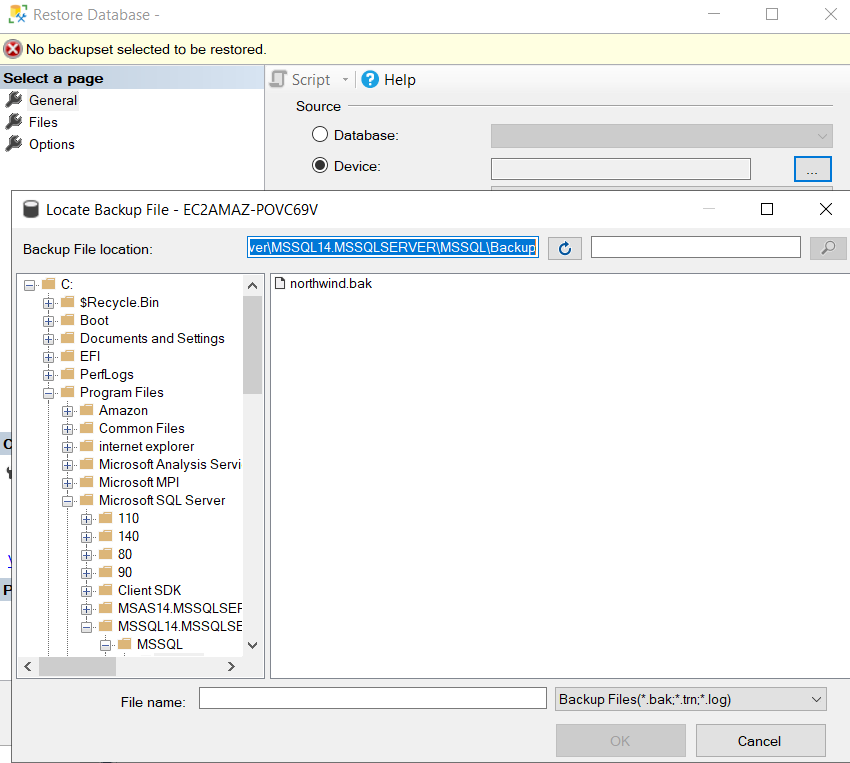
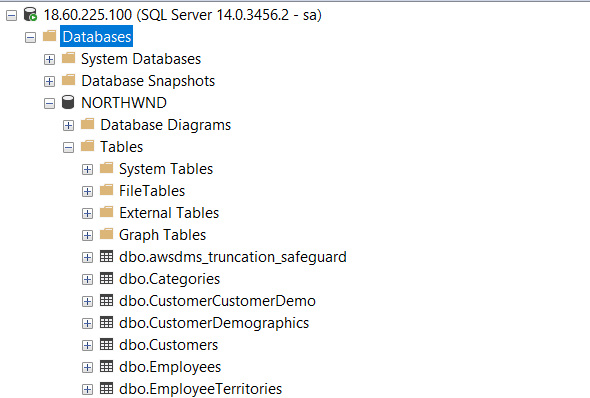
After restoring the database, we have to check if distributor and cdc is enabled for the databse or not as if it is not enabled it will give error at time of DMS replication.
We can check if Distributor is enabled or not by the following command.
sp_get_distributor
If the output shows null, then we have to enable it. On Replication 🡪 Configure Distribution 🡪 Create and Finish.
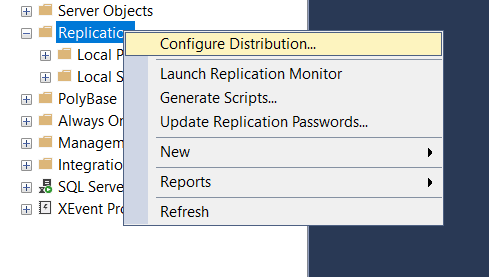

To enable CDC, we have run the following command, where NORTHWND is the database name
USE NORTHWND
GO
EXEC sys.sp_cdc_enable_db
GO
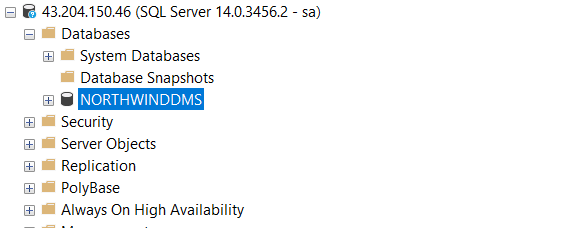
In the Mumbai Server we will create a black database.
Step 4:
Now we will configure DMS in Hyderabad Region.
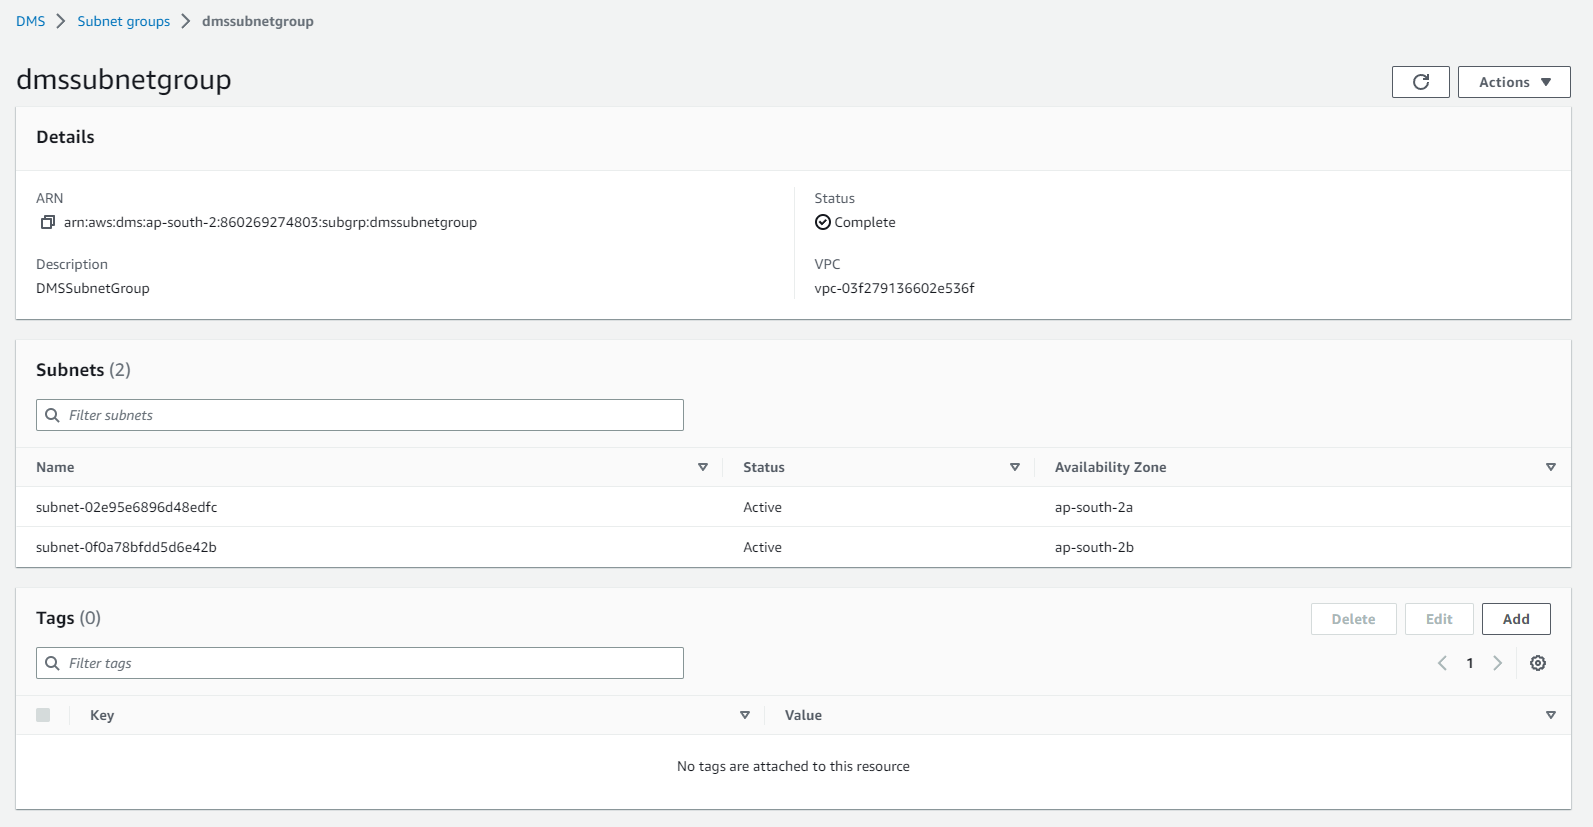
First step will be configuring the Subnet Group. In this demo, I have created the Subnet Group named dmssubnetgroup in the previously mentioned CIDR Range VPC, and selected the Public Subnets of the VPC.
Second, we will create the Replication Instance.
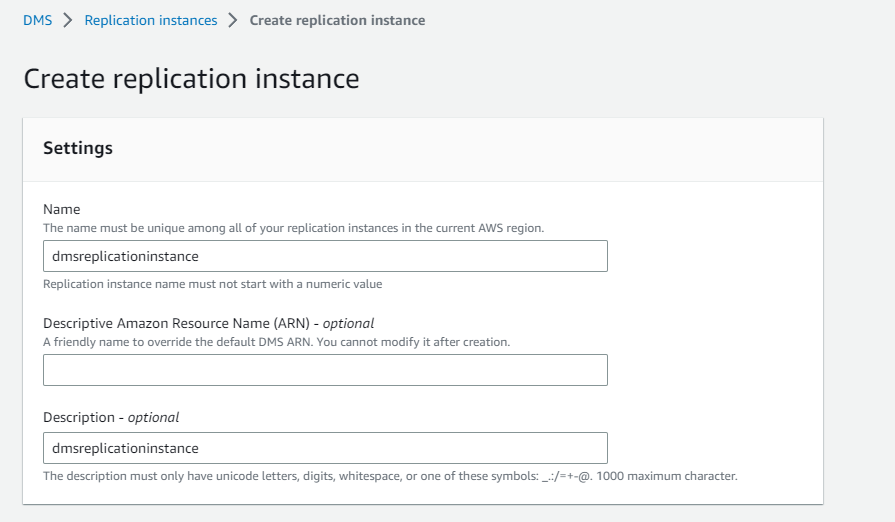
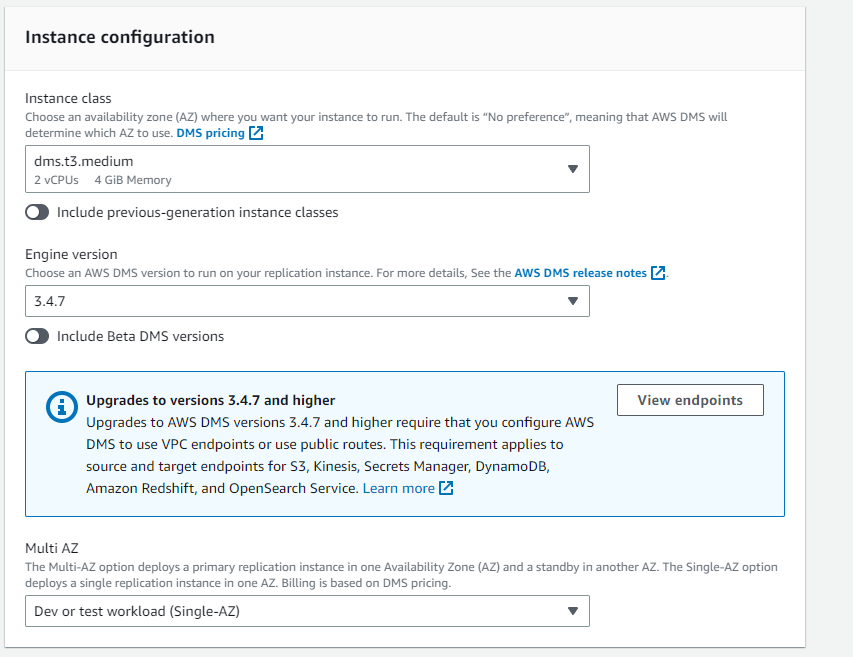
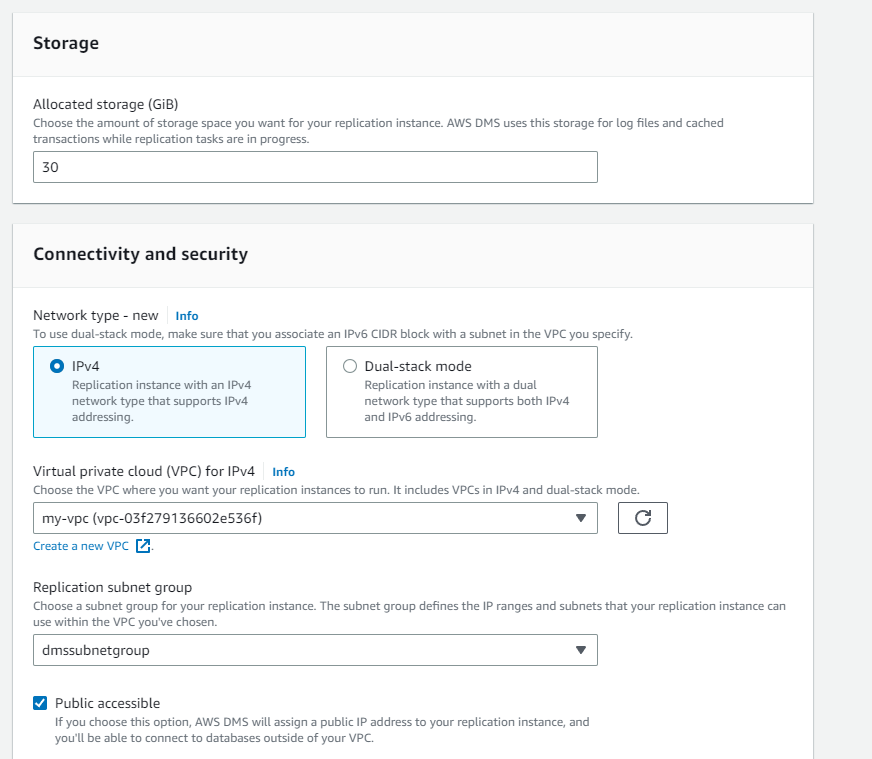
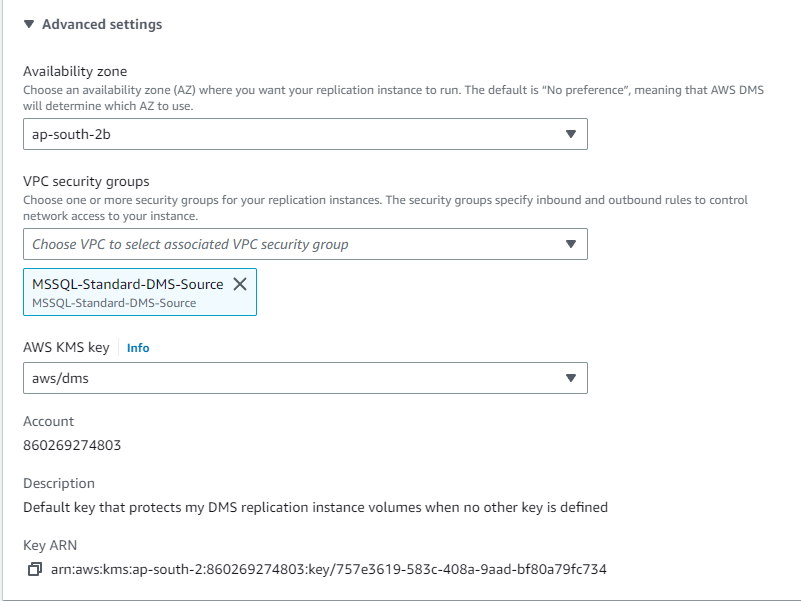
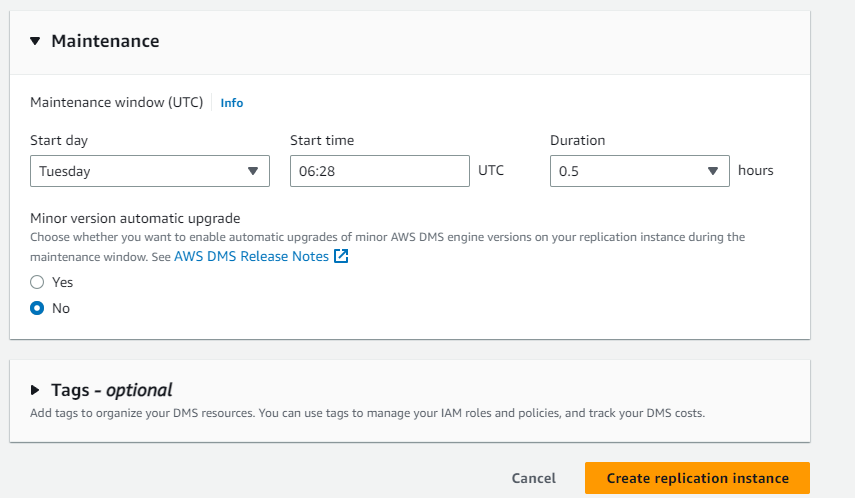
For this instance setup, I have selected dms.t3.medium and the engine of latest version. As this is for demo/testing purpose I have selected Single Az. For storage I have selected 30GB. For connectivity I have selected the same VPC and selected the previously created Subnet Group and made it Publicly Accessible. In Advanced Security I have selected the AZ where I have launched the Instance and same security group which I have created for my EC2 Instance. I have not selected Maintenance Window. Then I have created the Replication Instance.

Third, we have to create Source and Destination Endpoint.
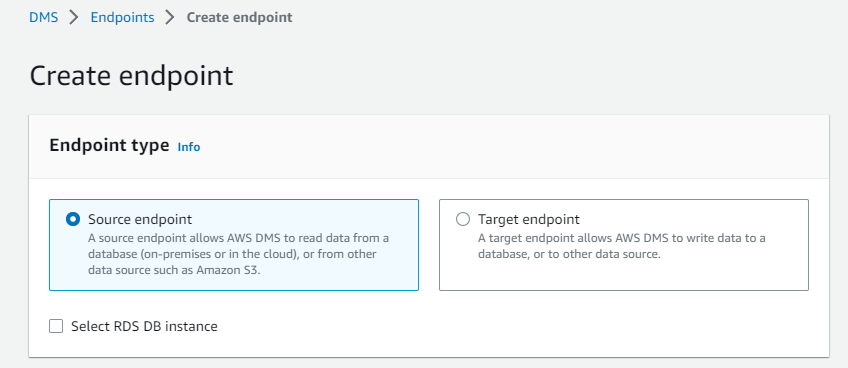
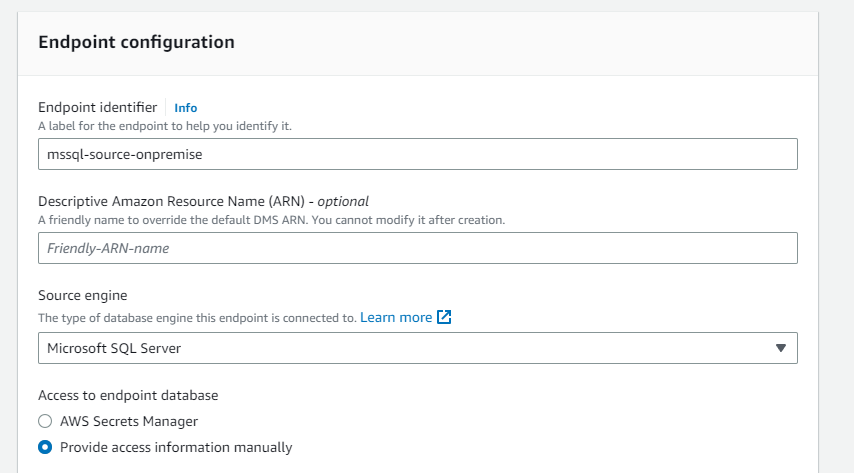
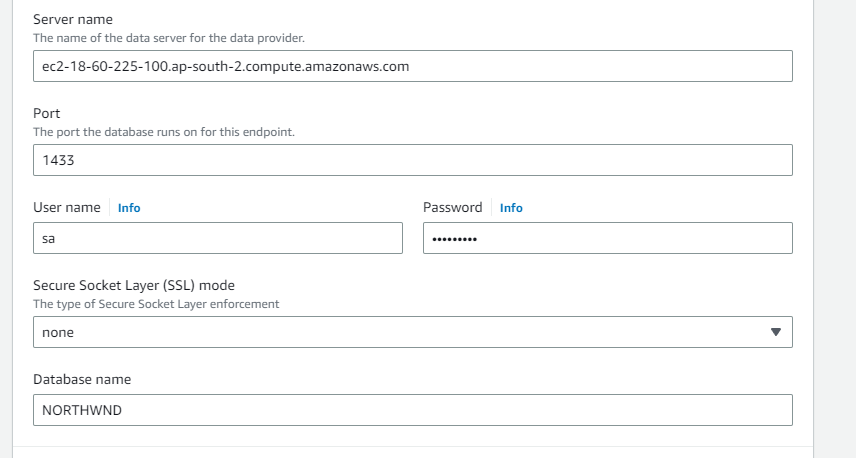
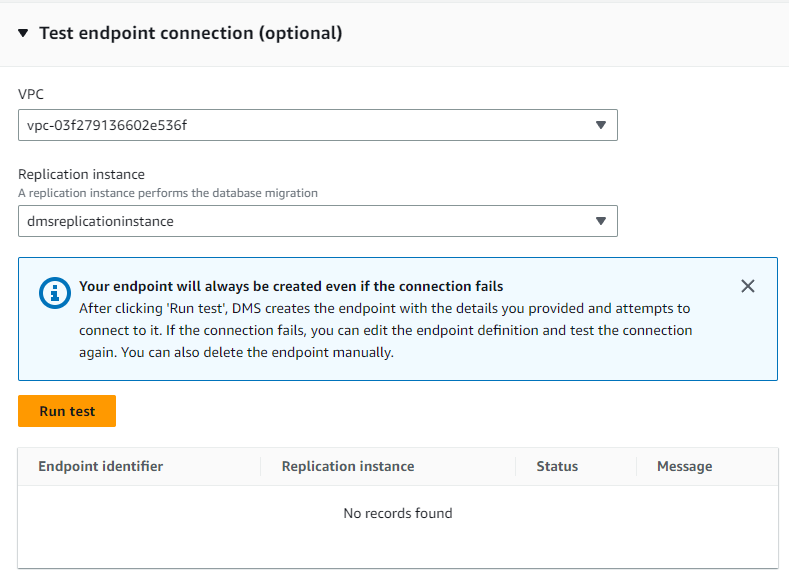
Here, we can test if the endpoint connection is successful or not. We have selected the same VPC and previously created Replication Instance.
After Source Endpoint is created we can also check if the connection was successful or not.
If it is not successful it will show the error message, you can change the configuration by modifying the endpoint or deleted it created a new one. As once you click Run Test the endpoint is created whether it is successful or not.

Now we will create the Destination Endpoint same way. We have selected the same VPC and previously created Replication Instance in the Destination Endpoint also.
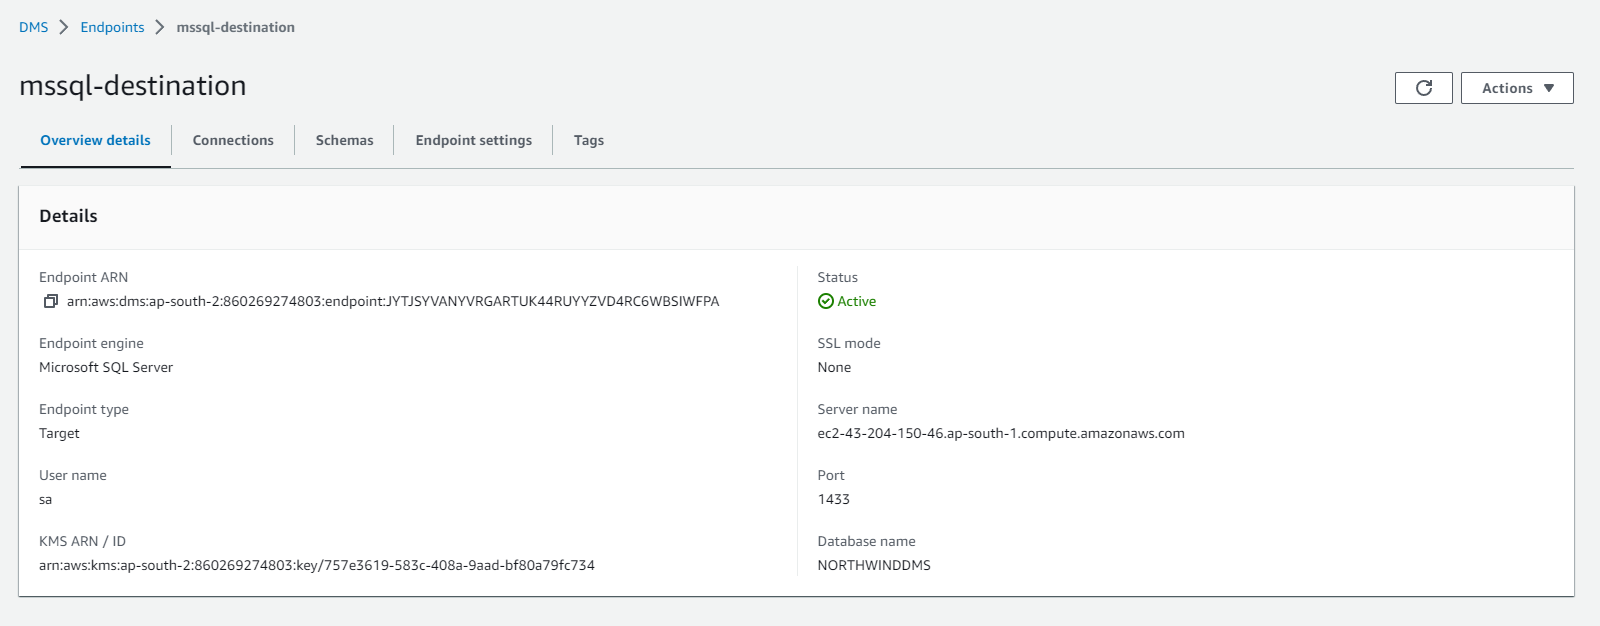

Now we have configured both the endpoints.

Fourth and Main step, creating Database migration tasks.
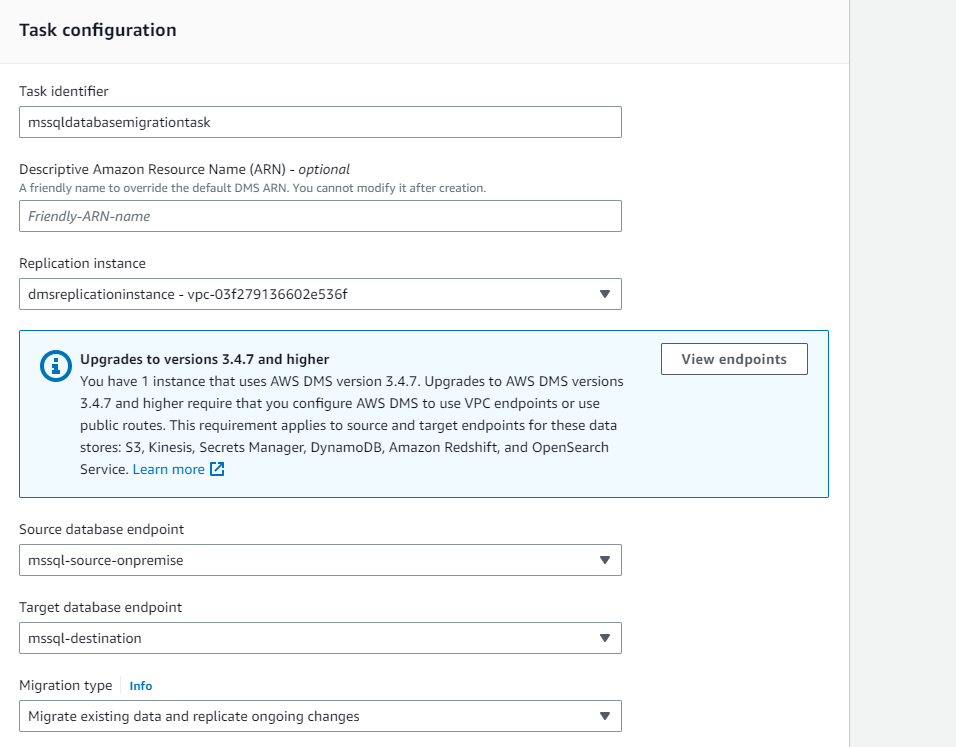
I have given the Task name “mssqldatabasemigrationtask” and selected the Replication Instance, Source Database Endpoint, Target Database Endpoint respectively which I have created earlier.
On Migration Task I have selected Migrate Existing Data and replicate ongoing changes which will move the whole database from source to destination and if any changes are made in source database it will refplicate in destination Database.
Note:
Migration type
Migrate existing data – perform a one-time migration from the source endpoint to the target endpoint.
Migrate existing data and replicate ongoing changes – perform a one-time migration from the source to the target, and then continue replicating data changes from the source to the target.
Replicate data changes only – don’t perform a one-time migration, but continue to replicate data changes from the source to the target.
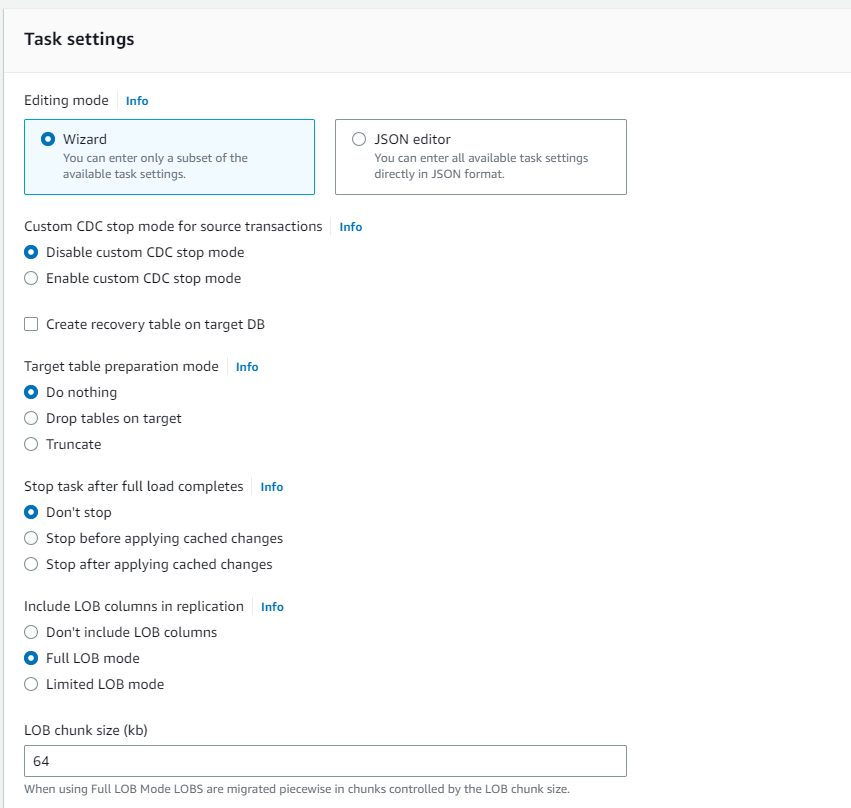
In Task Settings, I have selected the Followings:
CDC stop mode for source transactions : Disable custom CDC stop mode
Target table preparation mode : Do nothing
Stop task after full load : Don’t stop
Include LOBs, CLOBs, and similar large objects in the migration : Full LOB mode (LOB chunk size (kb) 64)
Note:
CDC stop mode for source transactions
Disable custom CDC stop mode : you can manually stop the task. If you choose
Enable custom CDC stop mode : you specify a custom CDC point to stop the task. To do so, use either the specified server stop time (UTC) or the stop time of a specified source transaction commit.
Target table preparation mode
Do nothing – if the tables already exist at the target, they remain unaffected. Otherwise, AWS DMS creates new tables.
Drop tables on target – AWS DMS drops the tables, and creates new tables in their place.
Truncate – AWS DMS leaves the tables and their metadata in place, but removes the data from them.
Stop task after full load
Don’t stop – Do not stop the task, immediately apply cached changes and continue on
Stop before applying cached changes – Stop the task prior to the application of cached changes. This will allow you to add secondary indexes which may speed the application of changes.
Stop after applying cached changes – Stop the task after cached changes have been applied. This will allow you to add foreign keys, triggers etc. if you are using Transactional Apply.
Include LOBs, CLOBs, and similar large objects in the migration
Don’t include LOB columns — AWS DMS ignores columns or fields that contain large objects (LOBs).
Limited LOB mode — AWS DMS truncates each LOB to the size defined by “Max LOB size”. (Limited LOB mode is faster than full LOB mode.)
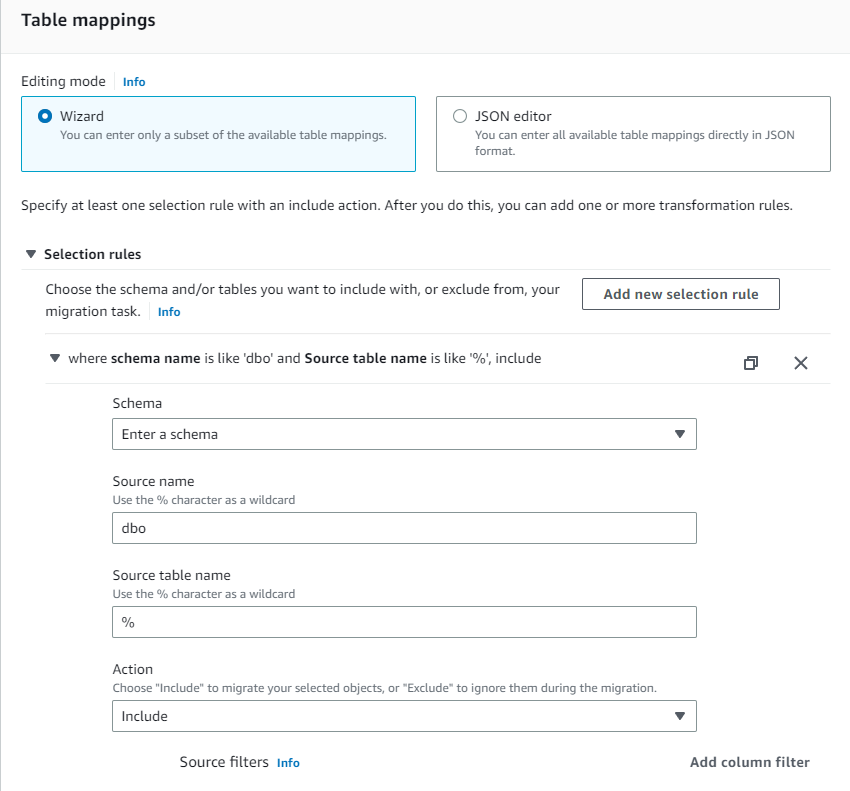
In Table Mappings 🡪 Selection Rules
Schema : Enter a schema
Schema Name: dbo
Table : % (all)

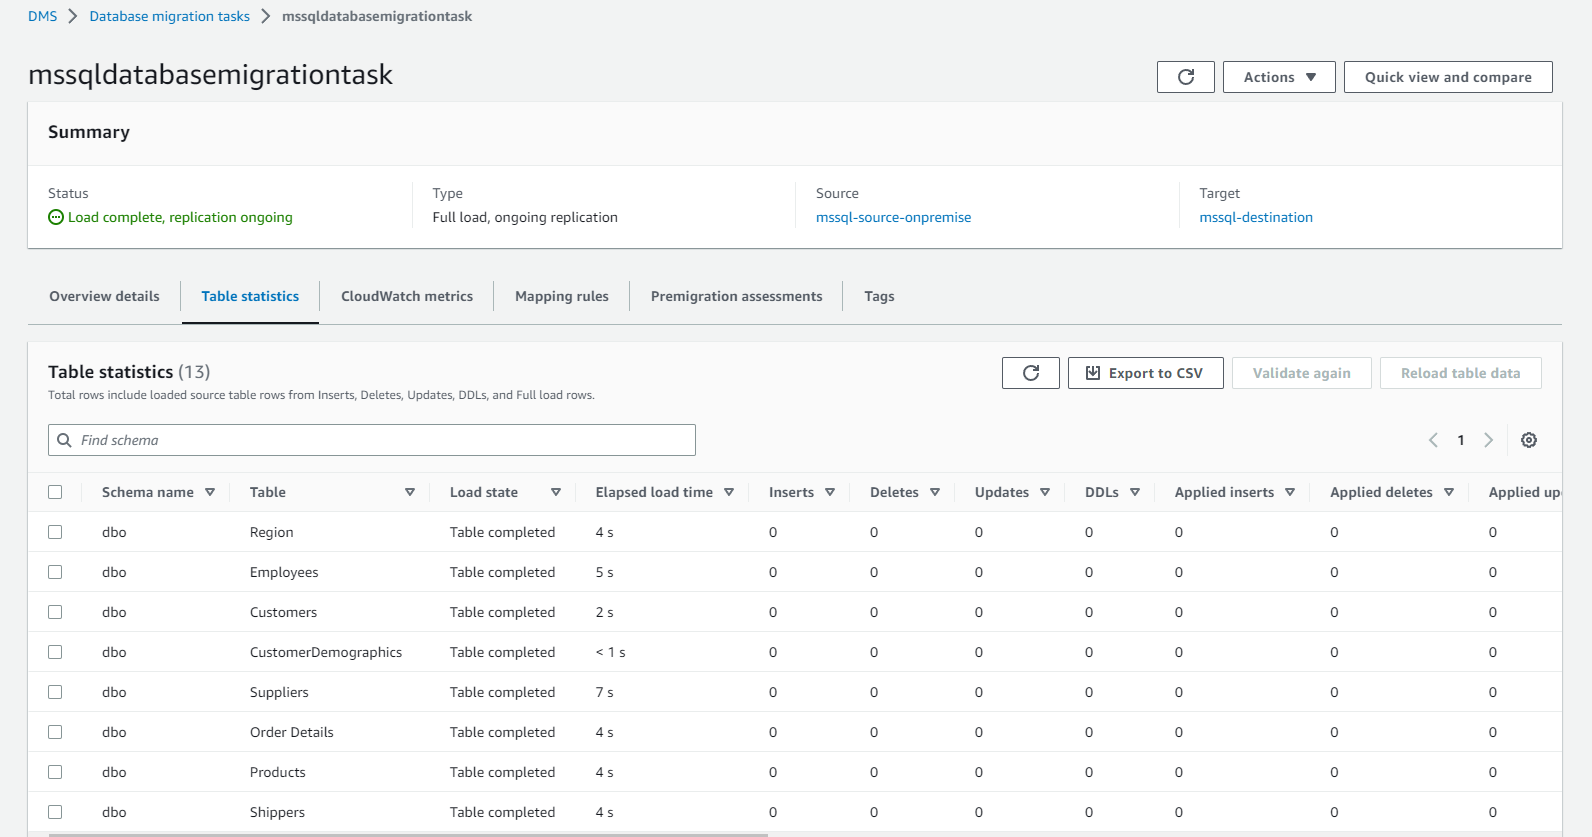
After the task is created it will show running 🡪 here it will migrate the database from Source to Destination. After Migration completed it will show Load complete, replication ongoing.

In Table Statistics, it will show all the details.
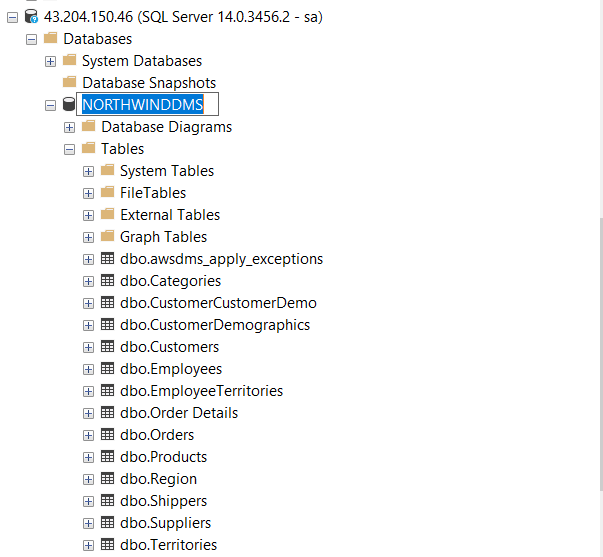
Now, we can check that in Destination Server the database is replicated.
