Written by Arunava Mukherjee, Operations Manager
Ansible is an open-source automation platform written in python, but Ansible modules can be written in any language that can return JSON (Ruby, Python, bash, etc).
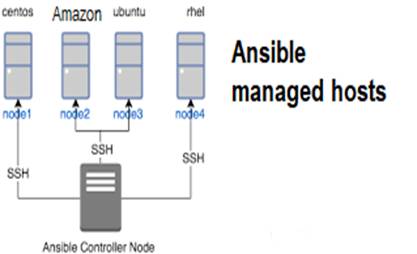
There are two types of nodes in Ansible architecture: the control nodes and managed hosts. Ansible is installed and run from a control node, and this machine also has copies of your Ansible project files. A control node could be any server hosted on AWS or local server or Laptop running Linux OS/MAC.
 The Ansible architecture is agentless. Typically, when you run an Ansible Playbook or an ad hoc command, the control node connects to the managed host using SSH (by default) or WinRM (for windows hosts). This means that clients don’t need to have an Ansible-specific agent (except for windows) installed on managed hosts, and don’t need to permit special network traffic to some non-standard port. Apart from ssh connectivity ansible managed host needs python3(python2.7 is no more officially supported) installed. AWS CFN template is also popularly used for playbook deployment.
Ansible setup for user creation concurrently in multiple servers
Objective: Recently, we got an order for 500+ AWS EC2 Linux instance management (server+desktop) and we need to implement an automation script to manage the user and software/service of these servers. Part1 of this blog, we covered how to create Ansible script/playbook to add a read-only user in every server with a common ssh key and limited permission to check logs and restart services.
Challenges: Since we manage and connect servers using OpenVPN and we use private Subnet/IP for some servers, we can’t connect all project servers at a time.
Workaround: We have used ssh config with proxy as a VPN server to connect all the ec2 servers.
Resources used: One Ec2 server (bastion server) as a control node and host connectivity with ssh proxy project-wise. Created the Ansible playbook usersetup.yaml.
The requirements to run the script i.e playbook called in Ansible terms is inventory file. For this we need to create the inventory as below example, since we have managed the ssh connectivity using ssh key, it’s easier for us to create the inventory using the project name and server name defined in sshconfig.
[project1]
Webserver
Dbserver
[project2]
Appserver
Dbserver
We have created the host file with a group of servers in a project tag.
2.After the host file is ready you can check the connectivity of host group with below commands:
#ansible hostgroup –m ping
 This is not This is not an ICMP ping, this is ssh connectivity check named as ping module.
Next, we need to prepare the playbook file. The playbook/script will run the task to create a user and then create the sudo permission. Some services are specific to OS _distribution which is distinguished with the term “when: ansible_distribution ==”.


N.B: please make sure you changed the hosts with the required host group( in place of all) at the begging of the playbook file if you run the playbook only for specific projects. The final step is the ssh_key for the user, which will be generated locally and updated in remote server authorized_keys.
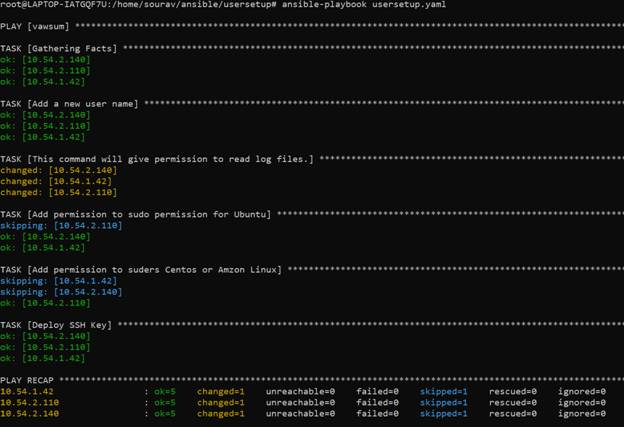
3.Next you need to run the playbook, you may get OK or changed if connectivity with the host is available. If a certain task like user creation already runs earlier it will give the output, ok, if anything new task is updating using this script it will give output as changed.

Next, you need to verify the user login and check you can login with the new user with the key provided and check if given permission for log files and service restarts are working.
Please note, service start/restart only work with systemctl with sudo
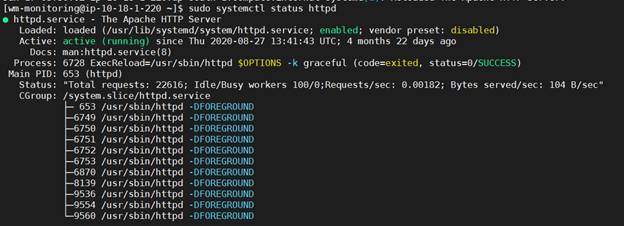
However, service status you can check without sudo.

sudo systemctl start service name (e.g sudo systemctl start apache2)
sudo systemctl restart service name (e.g sudo systemctl restart apache2)
N.B Please don’t test start/restart in production or UAT server without customer permission or actual requirements.


